How to Add a User to Active Directory

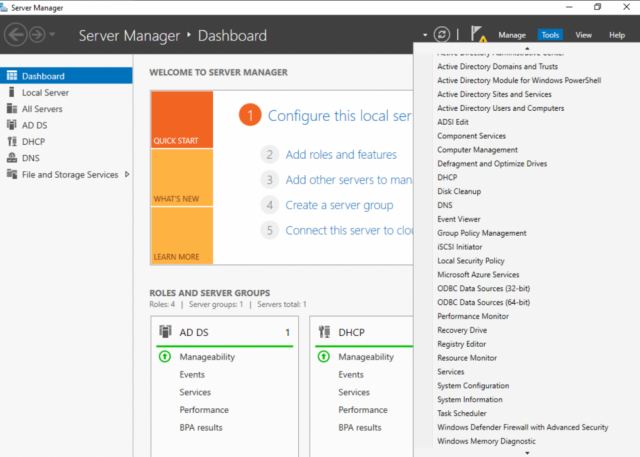
Tools Active Directory Users and Computers

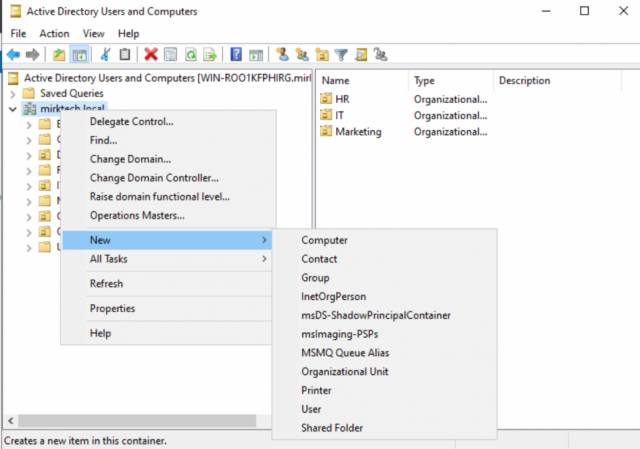
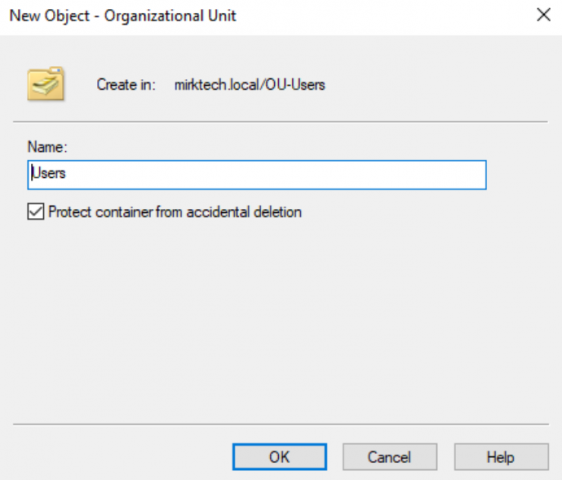
On the left side, you will see your domain name (in my case, mirktech.local). Right-click on it and select New Organizational Unit. Give it a name, for example, OU-Users.

Inside the newly created organizational unit, create a few more units by adding additional Organizational Units for your company’s departments, e.g., IT, HR, Marketing, etc.

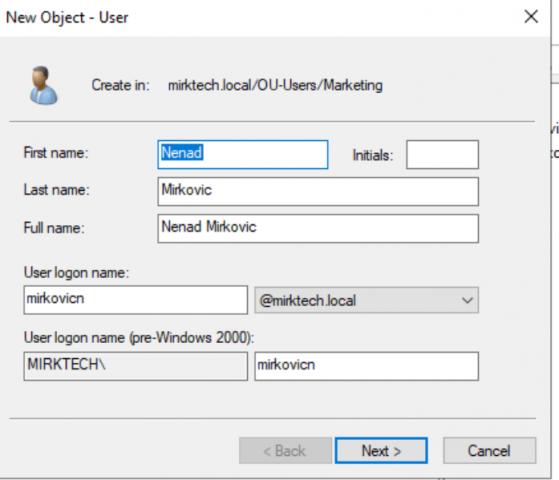
To create a new user, select the department where you want to add the user, right-click on it, and choose New User. Fill in the required fields: First name, Last name, Full name, and User logon name.

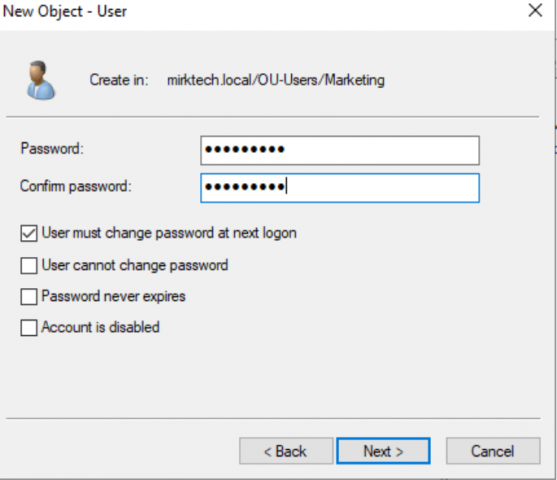
On the next screen, enter the password and confirm it. Make sure the option “User must change password at next logon” is checked.

Now, when the user logs on for the first time, they will be required to change their password.

* If you created an Organizational Unit with “Protect object from accidental deletion” enabled and want to delete it, go to View Advanced Features. Then, right-click the OU, select Properties Object tab, and uncheck “Protect object from accidental deletion”.

Install Active Directory on Windows Server 2022 in VMware Pro

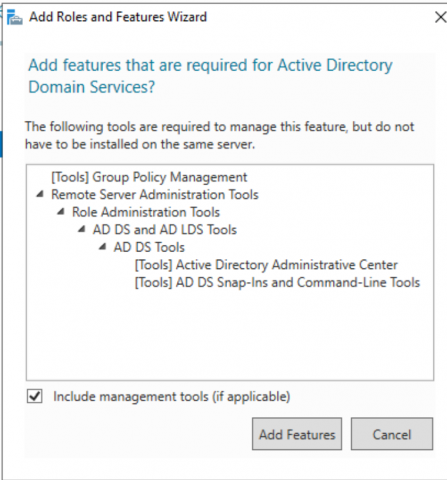
From Windows Server Manager, select Manage Add Roles and Features.

In the Add Roles and Features Wizard, check the “Skip this page by default” checkbox and click Next.

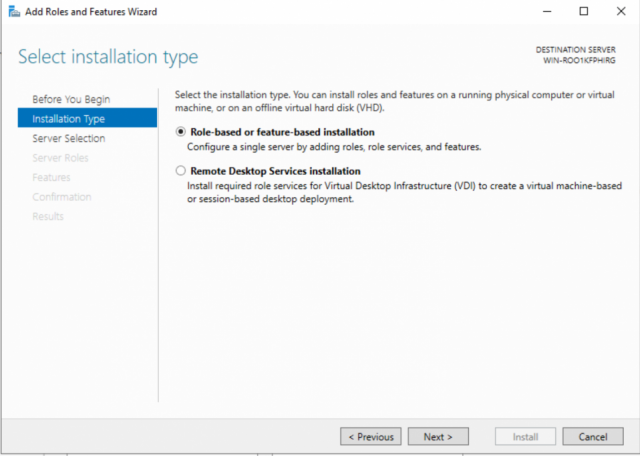
On the Installation Type page, select “Role-based or feature-based installation”, then click Next.

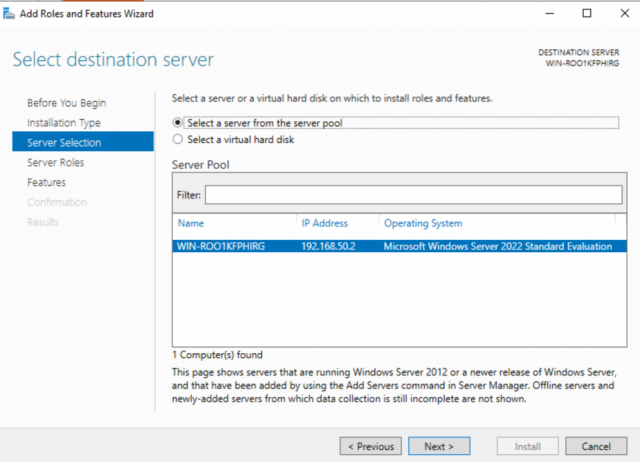
On the Server Selection page, select the server from the server pool and click Next.

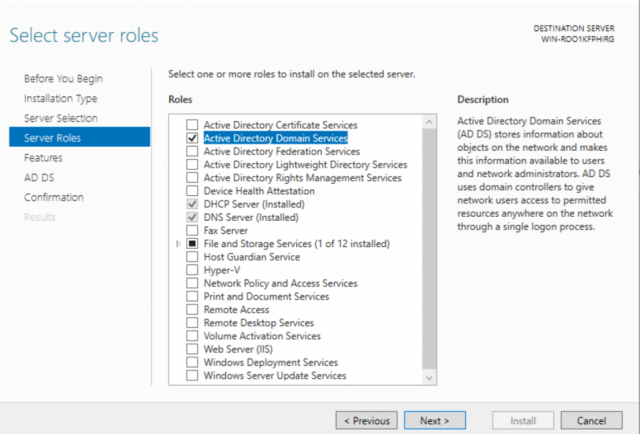
On the Server Roles page:

  • Check DNS Server
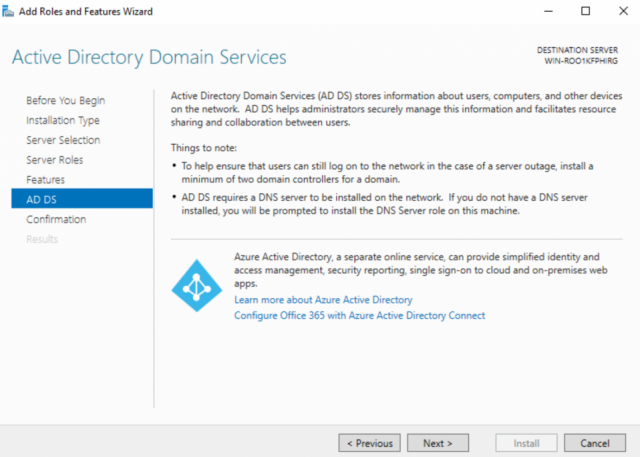
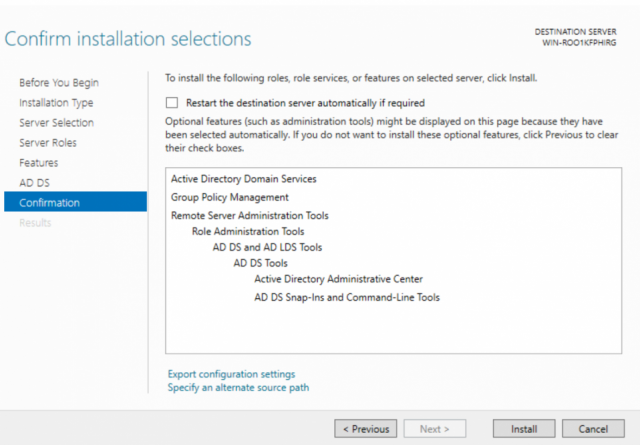
  • Check Active Directory Domain Services
  • Check DHCP Server (optional)

Click Next.

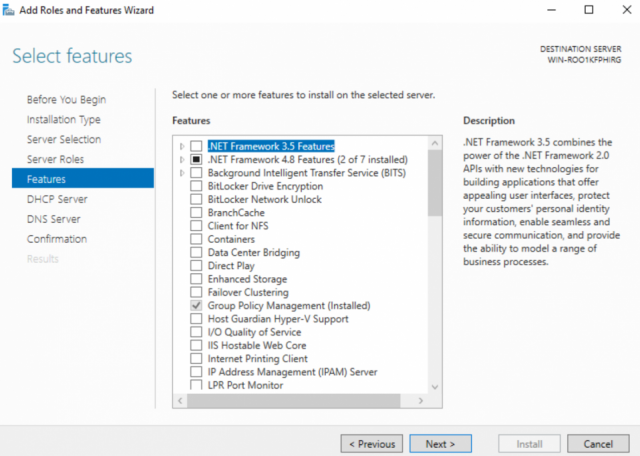
On the Features page, you can just click Next

Change Default Network Settings in VMware Pro

1. Change VM Network Adapter to NAT or Bridged:

  • Open VMware Workstation.
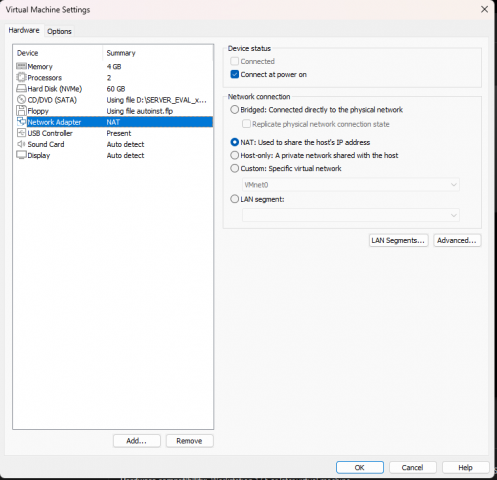
  • Right-click on your virtual machine Settings.
  • Go to Network Adapter.
  • Select either NAT or Bridged connection.
    • NAT is good if you want internet access behind a firewall with a private IP.
    • Bridged allows the VM to be on the same network as your host.

2. Configure Virtual Network Editor:

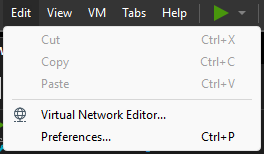
  • Go to Edit Virtual Network Editor.
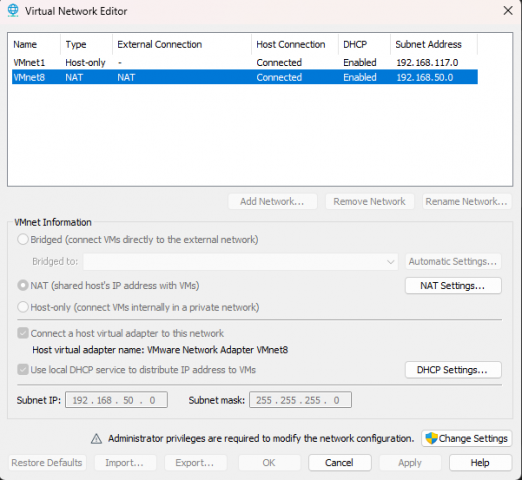
  • Click Change Settings (you need admin rights).
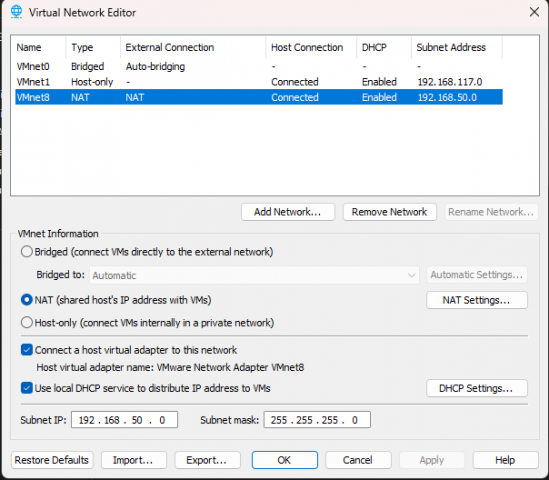
  • Select VMnet8 (for NAT) or VMnet0 (for Bridged, though Bridged uses your physical adapter and usually doesn’t have its own subnet configuration).
  • If using NAT (VMnet8):
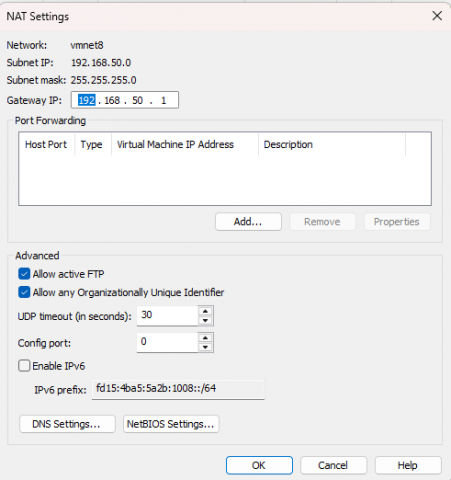
    • Change the subnet IP to your desired private network, e.g., 192.168.50.0.
    • Subnet Mask: 255.255.255.0.

3. Set NAT Gateway IP (only for NAT):

  • Still in Virtual Network Editor, with VMnet8 selected, click NAT Settings.
  • Set the Gateway IP to a value in your subnet (e.g., 192.168.50.1).
  • This is the IP your VM will use as a default gateway.

4. Use Public DNS Temporarily:

  • Before you configure your own DNS Server, use a public DNS like:
    • 8.8.8.8 (Google DNS)

5. Now You’re Ready to Set Up:

DNS Server (after which you can stop using public DNS).

Active Directory Domain Services (AD DS).

DHCP Server

Install Windows Server 2022 in VMware Pro

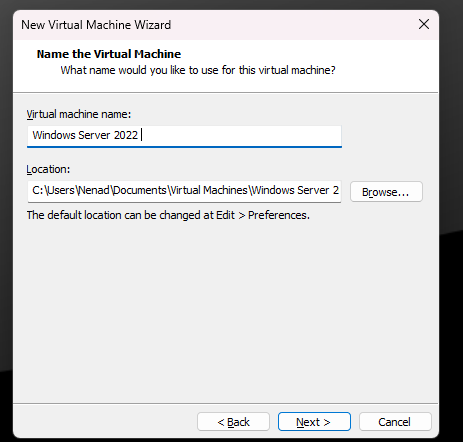
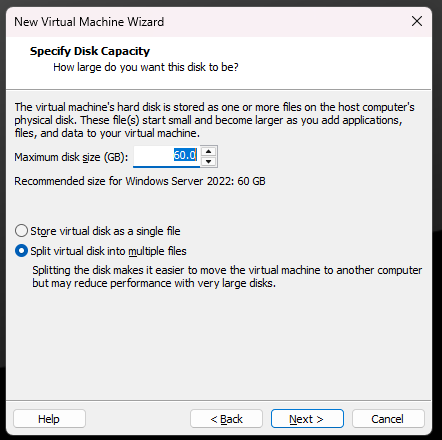
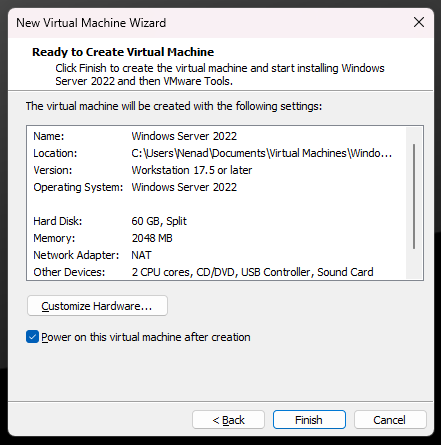
To install Windows Server 2022 on VMware Workstation Pro, follow these steps:

  1. Download the Windows Server 2022 ISO: Search for the Windows Server 2022 ISO (64-bit version) online and download it.
  2. Create a New Virtual Machine:
    • Once the download is complete, open VMware Workstation Pro.
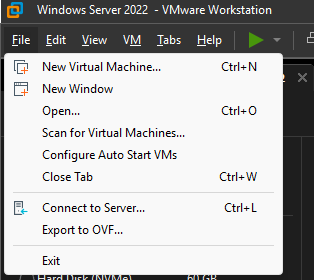
    • Go to File > New Virtual Machine or use the shortcut Ctrl+N to open the New Virtual Machine Wizard.
  3. Select the Installation Type:
    • The wizard will present two options: Typical or Custom. Choose Typical for a standard setup.
  4. Browse for the ISO:
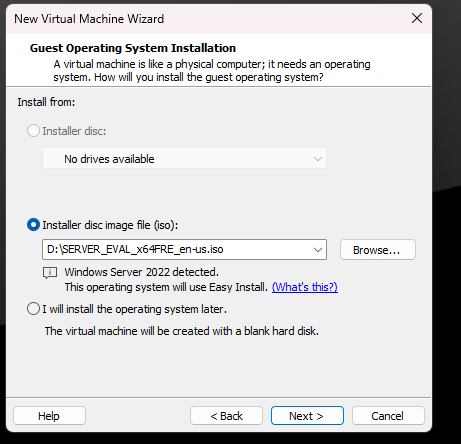
    • When prompted, browse to the location of the downloaded ISO file and select it, then click Next.
  5. Skip Product Key:
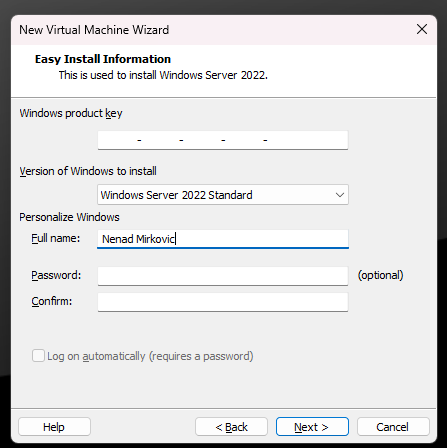
    • You can skip entering the product key at this stage. Select Windows Server 2022 Standard from the version list.
    • Enter your name and password if desired.
  6. Address Installation Errors (if applicable):
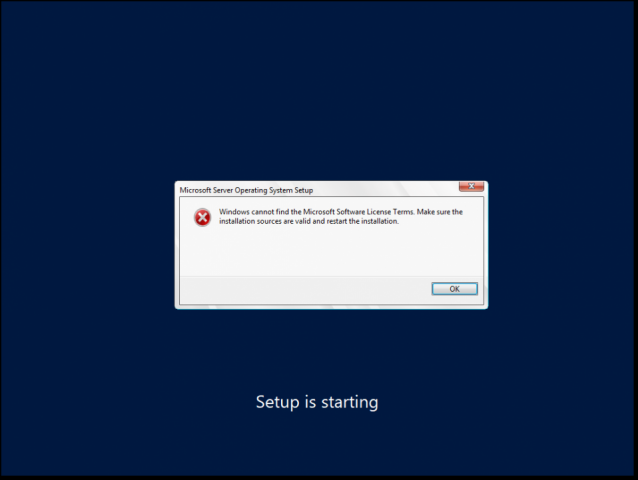
    • During installation, you might encounter the error “Windows cannot find the Microsoft Software License Terms.” To resolve this:
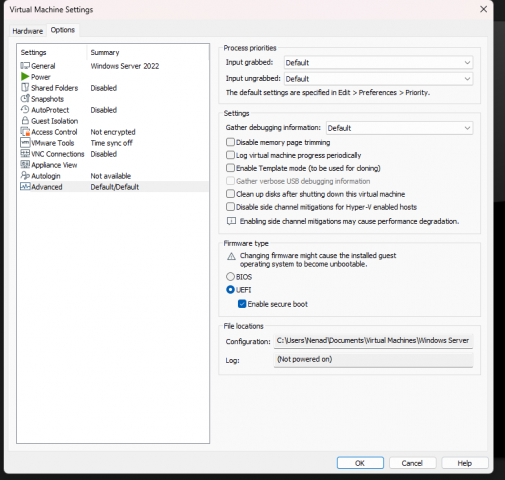
      1. Go to VM Settings > Options.
      2. Enable Secure Boot.
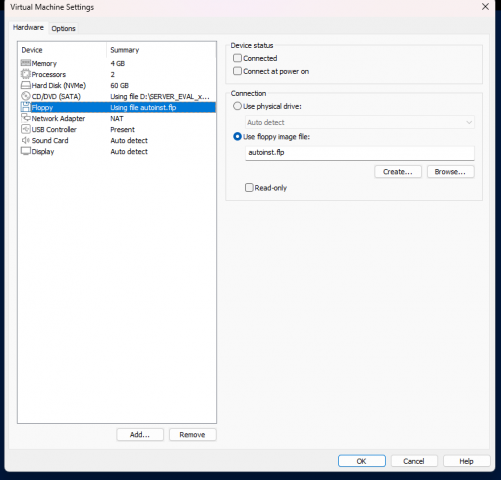
      3. Ensure the VM has at least 4GB of RAM and sufficient disk space.
      4. Disable the Floppy Disk option.
    • Once these adjustments are made, the installation should proceed smoothly.
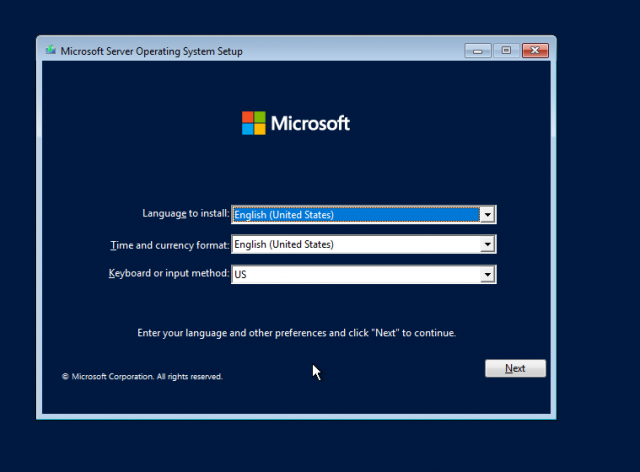
  7. Configure Language and Region:
    • After the system reboots, select your language, time and currency format, and keyboard layout, then click Next.
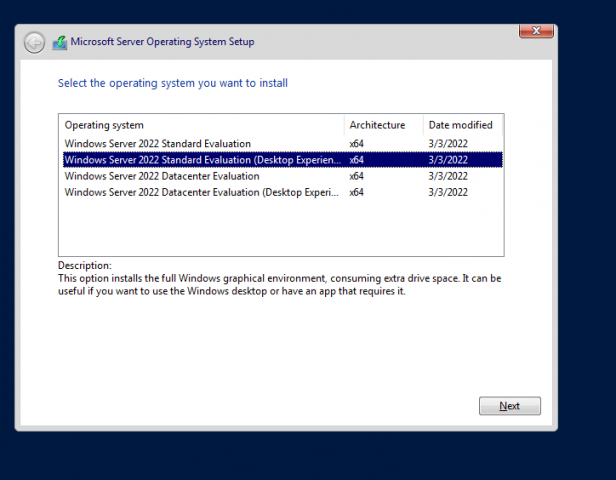
  8. Select Installation Type:
    • Choose Windows Server 2022 Standard Evaluation (Desktop Experience).
  9. Partition Setup:
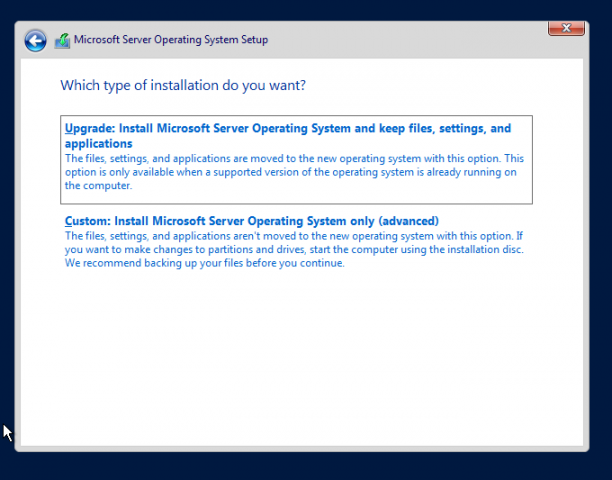
    • Select Custom to install Windows Server without additional software.
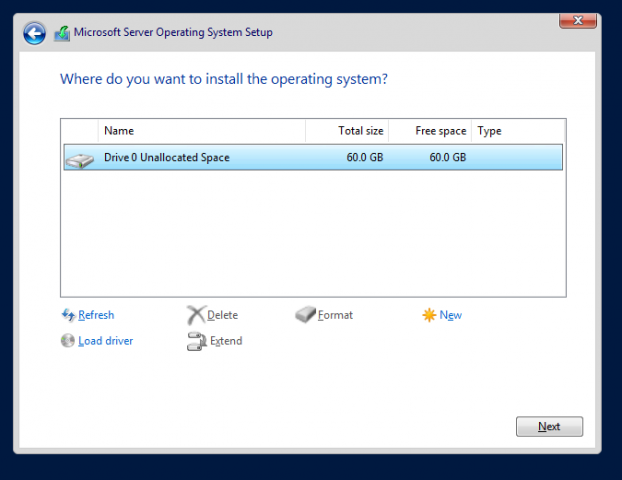
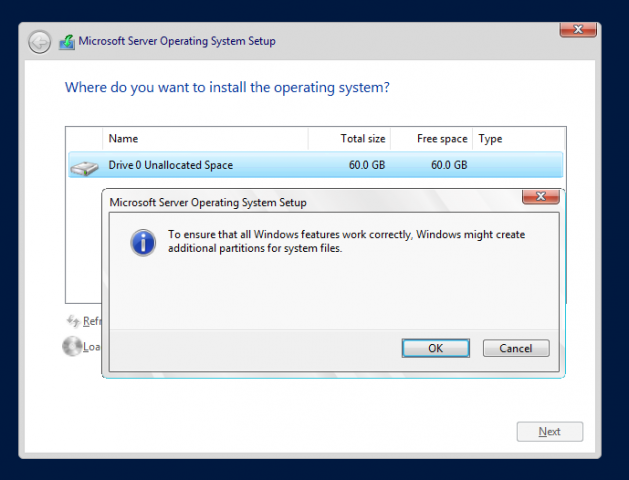
    • You can either click Next to accept the default partition size or select New to create a custom partition size for installation.
  10. Set Administrator Password:
    • When prompted, enter a password for the Administrator account. The password must meet the following requirements:
      • Minimum length: 7 characters
      • At least 1 uppercase letter, 1 lowercase letter, 1 number, and 1 special character.
  11. Finish Installation:
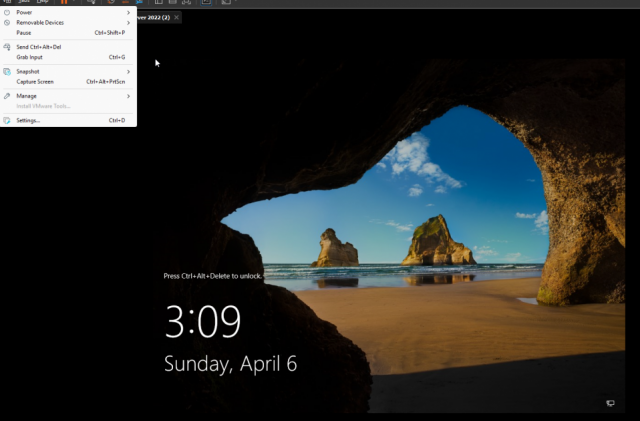
    • The installation will proceed. Once completed, you can use Ctrl+Alt+Del or go to the VM menu and select Send Ctrl+Alt+Del to access the login screen.

That’s it! You have successfully installed Windows Server 2022 on VMware Workstation Pro.